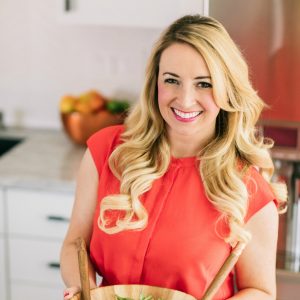
Browsing articles tagged with "Ground Beef Archives - Little Leopard Book"
Apr 30, 2012
littleleopardbook

Loaded Calzone

By now, most of you reading this know about my deep, passionate love affair with… Italian food!  I have never made a calzone before but since I’m on a kick of making my own bread, breadsticks, pizza crusts, etc. I decided it was time to make my own calzone!!!

I simply took my pizza dough recipe, altered it a little and made a calzone dough, then filled it with all my favorite things!  That’s the great thing about pizza and calzones, you can “load” them with whatever you like!!

Ingredients (dough) – (makes 1 calzone, serves 4)

  • .25 oz active dry yeast
  • 1 cup warm water
  • 1 tbsp olive oil
  • 1 tsp granulated sugar
  • 1 tsp garlic salt
  • 2 1/2 cups flour

Start by combining the yeast and water.  Wait for the mixture to bubble, then add the oil, sugar and salt.

Now, add in the flour and work into a ball. Place on a floured surface and kneed for 10 minutes.

Now place the dough in a large bowl coated in olive oil, flip, cover and allow to rise for 45 minutes or until doubled in size.

In the mean time prepare the filling ingredients.

Ingredients (filling)

  • 1 lb ground beef
  • 1 green bell pepper (chopped)
  • 1 onion (chopped)
  • 3 cloves garlic (minced)
  • 2 tbsp fresh basil (chopped)
  • 1 tsp dried oregano
  • 1 tsp dried parsley
  • 1 cup ricotta cheese
  • 1/2 cup mozzarella cheese
  • 1/4 cup parmesan/romano cheese
  • 1 cup homemade tomato basil marinara (for dipping)

Start by browning the ground beef. Once cooked and drained of grease add in the bell pepper, onion and garlic and cook on medium-low heat for an additional 5 minutes.

Next add in the spices and cook on low for an additional 3-4 minutes.

At this time the calzone dough should be doubled in size and ready to be rolled out. Roll the dough into a thin, oval shape.

Now start by filling with the ricotta cheese. (I added some of the spices to the ricotta as well to give it that little extra kick of flavor!)

Next, place the ground beef mixture on top.

Lastly, top with the remaining cheeses.

Now fold the dough over and use your fingers to crimp the edges and form a tight seal around the calzone.

Brush the top with olive oil to give it that nice brown crust.

Place in a 375° oven for 40-45 minutes or until golden brown.

By this picture you get an idea of just how GIANT this calzone is!  You can easily half the recipe to make a smaller version or divide the dough in half to make two calzones with different fillings for friends or family members with differing tastes!

That’s some Italian meaty-cheesy deliciousness right there!!!

Serve with a warm side of marinara sauce for dipping!

♣ Vegetarian Option: Substitute vegetables such as spinach, mushrooms or eggplant for the ground beef.

♥ All pottery seen on the littleleopardbook can be purchased by visiting www.longaberger.com/muffetbond or e-mailing keepsakebl@sbcglobal.net.

Oct 12, 2011
littleleopardbook

Mexican Casserole

When it comes time to decide on and prepare a dish to take to a party, I really feel the pressure!  It must be something that I can make ahead of time, transport to the party (which in LA can take 20 minutes or 2 hours!) and still be super-delicious when I arrive!  This particular occasion called for another “Gameday Grub” recipe, as I now like to call any dish I make that corresponds with football and beer.

This dish originated at my aunts annual Christmas Eve dinner. Since we (my brother and I) were the only children in the family my parents insisted on having Christmas at our house every year after we were born, so a few years later my aunt started the tradition of having Christmas Eve dinner at her house.  She would make a lot of small bites like sausage balls, pigs in a blanket and queso dip and chips (an Oklahoma standard), but one year she started making this Mexican Casserole. It’s almost like a chili con queso with tortilla strips and cheese on top baked into the form of a casserole.

Ingredients (serves 4)

  • 1 lb ground beef
  • 1 small onion (chopped)
  • 4 oz velveeta cheese
  • 1 can rotel
  • 1 can ranch style beans
  • 1 can cream of mushroom soup
  • 2 cups shredded mexican style cheese
  • 10 small corn tortillas
Start by browning the ground beef and chopped onion together. If you are cooking this at home pre-heat your oven to 350°. I put my casserole together, then cooked it once I got to the party.
Once your meat is cooked through, drain any grease and add your soup, rotel, beans and velveeta.
I cut my velveeta into little chunks so that it will  melt faster. Once your cheese has melted in it should have a somewhat thin consistency and appear like this ↓
You are now ready to assemble your casserole! Start by pouring the mixture into the bottom of a 9 x 13 casserole dish.
Next, tear your tortillas into small pieces and layer on top.
Next, layer your cheese on top.
Now it’s ready to go in the oven, or in my case, put a lid on and off to party! Either way, when you’re ready to bake, put it in the oven for 30 minutes or until your cheese is all melty and bubbly.
Unfortunately and fortunately it came out of the oven looking so appetizing to the party guests, I was not able to get an “out of the oven” shot, but just imagine cheesy perfection.  I did get a shot of my gameday grub plate including a piece of the casserole, as well as the rest of the dishes served. This party was at my friend Lindsay’s house, who if you remember from the Buffalo Chicken Dip post, was the original culprit of my addiction to Buffalo Chicken Dip.  Well, her boyfriend is now addicted to ALL things buffalo sauce so she got creative and made these fried buffalo mac and cheese balls… AMAZING!  Her boyfriend is submitting her to “Franks Red Hot Tailgate Recipe Challenge” and I think she has a definite chance of winning… innovative and scrumptious!!
Sep 11, 2011
littleleopardbook

Taco Ring with a Twist

Crescent Roll Taco Ring

Yes, yes, yes!  I’ve never been so excited to not be doing homework, but instead to be doing my new favorite thing, blogging!!! I have 5 words of advice for all of you in the blogging world… NEVER TAKE AN ONLINE CLASS!!!!! I’m serious, you’re basically saying, I would like to teach myself the entire subject of ___________(fill in the blank) and then do the readings and homework as well! So just don’t do it to yourselves, I beg of you, you will regret it!  Ok, I’ve warned you, I feel like I’ve done my civic duties for the day, and if that wasn’t enough now I’m also going to share with you my yummy dinner recipe from tonight! Aren’t I just the best??!!

Crescent Roll Taco Ring with a Twist

So today’s recipe comes from a childhood favorite of mine. When I was probably 11 or 12 years old my Mom took me to a Pampered Chef party (and people wonder why I love cooking so much!) and we made a taco ring, it instantly became a fav at the Bond household of picky eaters.

Southwest Taco Ring Recipe

Yes, growing up I took after my Mom and her horrible pickiness in food. There is no greater person in the world than my Mom, but there’s gotta be something a little weird about you if you don’t like food ;-) Luckily after moving across the country to the West Coast and into the land of fresh veggies, fruits and fish I broadened my horizons and now love every aspect of food, from shopping for it, to cooking it, to eating it (that part is probably my favorite!) Although most of my recipes I post are somewhat new or innovative, I like to throw in an old classic here and there as well, ie. the taco ring of today! I added some peppers and onions to the ground beef to give it a little more flavor and texture (that’s the twist part!)

Taco Ring Ingredients

Ingredients (serves 4)

  • 1 tbsp olive oil
  • 1 red onion (chopped)
  • 1 bell pepper (chopped)
  • 1 lb ground beef
  • 2 (8 oz) cans of refrigerated crescent rolls
  • 1 cup shredded cheddar cheese
  • 1 tbsp homemade taco seasoning
  • 1 tbsp water

Optional Toppings

  • sour cream
  • diced jalapeños
  • salsa

Begin by heating the olive oil in a large skillet over medium heat. Next, add the bell peppers and onions.

Colorful Bell Peppers and Onions

Sauté for 5 minutes then add the ground beef and brown. In the meantime, pre-heat the oven to 375°.

Taco Ring Ground Beef Filling

Drain the grease from the ground beef, then add the taco seasoning, water and cheese.

Taco Ring Meat Cheese and Seasoning

Now it’s time to form a ring with the crescent rolls!

Start by placing a small glass on the center of a baking stone to get that perfect circle in the middle! Next, stagger the crescent rolls around with the wide ends overlapping in the center. Once they’re all on there it should look something like this ↓

Crescent Roll Ring

Next, pile the meaty, cheesy mixture of yummyness onto the crescent roll ring!

How to make the perfect taco ring

Now it’s time to get a little messy, you basically need a system of how to roll the dough up around that mound of meat after removing the glass without it all dumping into the middle.

Bell Pepper Ground Beef Taco Ring Filling

My recommendation: slow and steady! Look at that perfect little middle circle!

Once it’s all rolled up it should look something like this ↓

How to make a taco ring

Now it’s time to pop this baby in the oven. Cook for 20-25 minutes or until golden brown and beautiful.

Bell Pepper Ground Beef Taco Ring

Place a ramekin filled with your favorite optional toppings in the middle such as sour cream topped with tomatoes and jalapeños, salsa or guacamole.

Taco Ring Recipe

I love seeing that cheesy, ooey, gooeyness surrounded by all that meatiness and wrapped in flakey, delicious crescent rolls.

Crescent Roll Taco Ring with Sour Cream

Bell Pepper Ground Beef Taco Ring

Ok already, I’m hungry!  Time to slice into this baby and go to town!

Taco Ring with Sour Cream

I’m now ready to sit down and devour this while watching tonight’s episode of “The Great Food Truck Race”!  What a great Sunday night :-) Til next time bloggies!!

Taco Ring with a Twist

♣ Vegetarian Option:  Substitute meatless crumbles for the ground beef to make this recipe vegetarian.

♦ Gluten Free Option: Gluten Free Mom has a recipe for gluten-free crescent rolls that could be used in place of the traditional Crescent rolls to make this recipe gluten-free.

♥ All pottery seen on the littleleopardbook can be purchased by visiting www.longaberger.com/muffetbond or e-mailing keepsakebl@sbcglobal.net.

Taco Ring with a Twist

Prep Time: 20 minutes

Cook Time: 20 minutes

Serving Size: 4

Taco Ring with a Twist

Ingredients

  • 1 tbsp olive oil
  • 1 red onion (chopped)
  • 1 bell pepper (chopped)
  • 1 lb ground beef
  • 2 (8 oz) cans of refrigerated crescent rolls
  • 1 cup shredded cheddar cheese
  • 1 tbsp homemade taco seasoning
  • 1 tbsp water
  • Optional Toppings
  • sour cream
  • diced jalapeños
  • salsa

Instructions

  1. Heat the olive oil in a large skillet over medium heat.
  2. Add the bell peppers and onions to the oil.
  3. Sauté for 5 minutes then add the ground beef and brown.
  4. Pre-heat the oven to 375°.
  5. Drain the grease from the ground beef, then add the taco seasoning, water and cheese
  6. Form a ring with the crescent rolls by placing a small glass on the center of a baking stone then staggering the crescent rolls around the glass with the wide ends overlapping in the center.
  7. Add the ground beef mixture to the middle of the crescent roll ring around the cup.
  8. Remove the glass from the middle and roll the dough up and over the ground beef.
  9. Place the roll in the oven for 20-25 minutes.
  10. Remove from the oven and place a ramekin filled with optional toppings in the middle of the roll.
http://littleleopardbook.com/2011/09/11/whats-for-dinner-taco-ring-with-a-twist/

My name is Whitney Bond and I’m a little girl with a big appetite. When people ask 
what kind of food I make, I always say “experimental”. I love coming
 up with new ideas for classic favorites or turning a generally
 unhealthy ... (read more!)

Member Of:

Don't miss a delicious recipe or awesome giveaway! Subscribe to our free email newsletter.

Top Posts & Pages

Tweet With Me!

LLB Loves Our Sponsors & Affiliates

Cost Plus World Market - Unique, Authentic, and Always Affordable
534460_shopKitchenAid.com Logo

As Seen On:

%d bloggers like this: